Building a robust and successful API goes beyond just writing efficient code. Clear, comprehensive, and user-friendly API documentation is paramount for developers who will integrate with your service. Without it, adoption suffers, frustration mounts, and your API’s potential remains untapped.
In this post, we’ll explore how to leverage Swagger, now known as the OpenAPI Specification, to create exceptional API documentation that not only helps developers but also boosts your API’s discoverability and overall success.
Why Great API Documentation Matters (Beyond Just Listing Endpoints)
Think of your API documentation as the user manual for your digital product. Effective documentation:
- Accelerates Integration: Developers can quickly understand how to interact with your API, reducing integration time and effort.
- Reduces Support Burden: Well-documented APIs answer common questions proactively, minimizing support requests.
- Improves Developer Experience (DX): A positive DX leads to higher adoption rates and happier users.
- Enhances Discoverability: Clear documentation can indirectly improve search engine visibility for your API and related resources.
- Facilitates Collaboration: It provides a single source of truth for everyone involved in the API’s lifecycle.
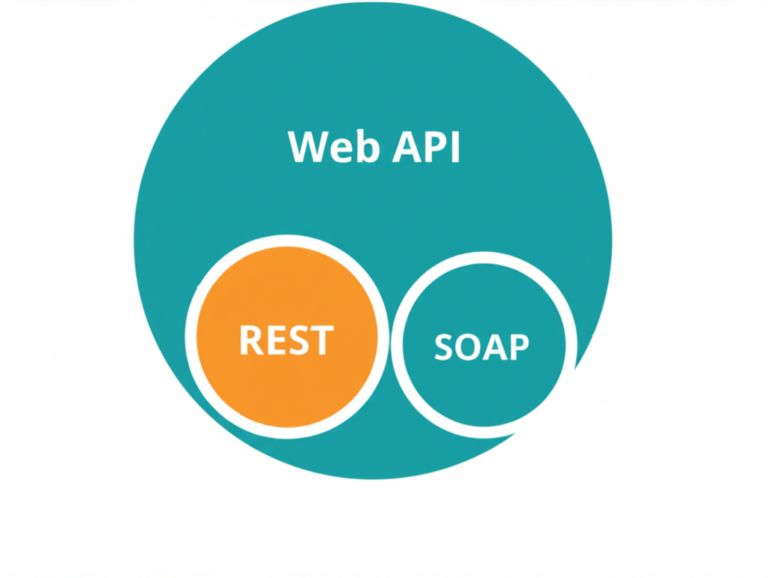
Introducing Swagger/OpenAPI: The Industry Standard
Swagger, now officially the OpenAPI Specification, is an open-source framework for describing and documenting RESTful APIs. It provides a standardized format that is both machine-readable and human-readable. This enables a powerful ecosystem of tools that can:
- Generate Interactive Documentation: Create visually appealing and interactive documentation websites directly from your API definition.
- Automate Code Generation: Generate client libraries (SDKs) in various programming languages, streamlining integration.
- Enable API Testing: Utilize tools to send requests and inspect responses directly from the documentation.
- Design-First Approach: Define your API structure before writing code, fostering better API design.
Getting Started with Swagger/OpenAPI in Your Node.js Express Project
Assuming you’ve already built your RESTful API using Node.js and Express (as outlined in our previous tutorial), here’s how to integrate Swagger/OpenAPI:
1. Install swagger-ui-express and swagger-jsdoc:
Bash
npm install swagger-ui-express swagger-jsdoc --save-dev
swagger-ui-express: This package allows you to serve dynamically generated Swagger UI documentation from your Express application.swagger-jsdoc: This package parses JSDoc-style comments in your code to generate your OpenAPI specification.
2. Configure swagger-jsdoc:
Create a configuration object for swagger-jsdoc in your server.js or a separate configuration file (e.g., swaggerConfig.js):
JavaScript
// swaggerConfig.js
const swaggerDefinition = {
    openapi: '3.0.0',
    info: {
        title: 'Your API Title',
        version: '1.0.0',
        description: 'A comprehensive description of your API.',
    },
    servers: [
        {
            url: 'http://localhost:3000/api', // Replace with your API base URL
            description: 'Development server',
        },
    ],
};

const options = {
    swaggerDefinition,
    // Path to the API docs
    apis: ['./routes/*.js', './models/*.js', 'server.js'], // Adjust paths to your API route and model files
};

const swaggerSpec = require('swagger-jsdoc')(options);

module.exports = swaggerSpec;
Explanation:
openapi: Specifies the OpenAPI specification version.info: Contains metadata about your API, including the title, version, and a detailed description. A well-crafted description is crucial for SEO and developer understanding. Use relevant keywords naturally.servers: An array defining the base URLs of your API.apis: An array of paths to your API route files, model files, and any other files containing JSDoc comments describing your API endpoints and schemas. Ensure these paths are correct.
3. Document Your API Endpoints and Models using JSDoc:
In your route files (e.g., routes/item.js) and model files (e.g., models/item.js), use JSDoc-style comments to describe your API endpoints, parameters, request bodies, and responses.
Example in routes/item.js:
JavaScript
/**
 * @swagger
 * /items:
 * get:
 * summary: Get all items
 * description: Retrieve a list of all available items.
 * responses:
 * 200:
 * description: A JSON array of items
 * content:
 * application/json:
 * schema:
 * type: array
 * items:
 * $ref: '#/components/schemas/Item'
 * 500:
 * description: Internal server error
 * content:
 * application/json:
 * schema:
 * type: object
 * properties:
 * message:
 * type: string
 */
app.get('/api/items', async (req, res) => {
    // ... your route logic
});

/**
 * @swagger
 * /items/{id}:
 * get:
 * summary: Get a single item by ID
 * description: Retrieve an item based on its unique identifier.
 * parameters:
 * - in: path
 * name: id
 * required: true
 * description: ID of the item to retrieve
 * schema:
 * type: string
 * responses:
 * 200:
 * description: The requested item
 * content:
 * application/json:
 * schema:
 * $ref: '#/components/schemas/Item'
 * 404:
 * description: Item not found
 * content:
 * application/json:
 * schema:
 * type: object
 * properties:
 * message:
 * type: string
 * 500:
 * description: Internal server error
 * content:
 * application/json:
 * schema:
 * type: object
 * properties:
 * message:
 * type: string
 */
app.get('/api/items/:id', async (req, res) => {
    // ... your route logic
});

// ... (similarly document POST, PUT, DELETE routes)
Example in models/item.js:
JavaScript
/**
 * @swagger
 * components:
 * schemas:
 * Item:
 * type: object
 * properties:
 * id:
 * type: string
 * description: The auto-generated ID of the item
 * readOnly: true
 * name:
 * type: string
 * description: The name of the item
 * description:
 * type: string
 * nullable: true
 * description: A detailed description of the item
 * createdAt:
 * type: string
 * format: date-time
 * description: The date and time the item was created
 * readOnly: true
 * updatedAt:
 * type: string
 * format: date-time
 * description: The date and time the item was last updated
 * readOnly: true
 * required:
 * - name
 */
const mongoose = require('mongoose');

const itemSchema = new mongoose.Schema({
    name: { type: String, required: true },
    description: { type: String },
    createdAt: { type: Date, default: Date.now },
    updatedAt: { type: Date, default: Date.now },
});

module.exports = mongoose.model('Item', itemSchema);
Key JSDoc Annotations:
@swagger: Marks a block for Swagger documentation./items: Defines the API path.get,post,put,delete: HTTP methods.summary: A concise summary of the endpoint. Use relevant keywords here.description: A more detailed explanation of the endpoint’s functionality. Incorporate relevant keywords naturally for SEO.parameters: Defines request parameters (path, query, header, cookie).requestBody: Describes the request body for POST and PUT requests.responses: Defines possible HTTP responses and their schemas.content: Specifies the media type of the response (e.g.,application/json).schema: Defines the structure of the request or response body.$ref: References a defined schema in thecomponents/schemassection.components/schemas: Defines reusable data structures (models).type: Data type (e.g.,string,integer,object,array).properties: Defines the properties of an object schema.required: An array of required properties.readOnly: Indicates that a property is only present in responses.nullable: Indicates if a property can be null.
4. Serve Swagger UI in Your Express App (server.js):
JavaScript
// server.js
const express = require('express');
const bodyParser = require('body-parser');
const mongoose = require('mongoose');
const dotenv = require('dotenv');
const swaggerUi = require('swagger-ui-express');
const swaggerSpec = require('./swaggerConfig'); // Import the Swagger configuration

const app = express();
const port = process.env.PORT || 3000;

dotenv.config();

app.use(bodyParser.json());

// Serve Swagger UI at /api-docs
app.use('/api-docs', swaggerUi.serve, swaggerUi.setup(swaggerSpec));

// ... your API routes ...

mongoose.connect(process.env.MONGODB_URI, { useNewUrlParser: true, useUnifiedTopology: true })
    .then(() => console.log('MongoDB Connected'))
    .catch(err => console.error('MongoDB Connection Error:', err));

app.get('/', (req, res) => {
    res.send('API is running! Visit /api-docs for documentation.');
});

app.listen(port, () => {
    console.log(`Server running on port ${port}`);
});
Now, when you run your server and navigate to /api-docs in your browser (e.g., http://localhost:3000/api-docs), you will see the interactive Swagger UI documentation for your API.
SEO Benefits of Well-Documented APIs
While API documentation itself isn’t directly indexed by search engines in the same way as a marketing page, well-structured and informative documentation can indirectly contribute to your API’s SEO:
- Increased Discoverability: Clear descriptions with relevant keywords help developers find your API when searching online for solutions in your domain.
- Improved Developer Engagement: Comprehensive documentation leads to higher adoption rates. More developers using your API can result in more online mentions, tutorials, and community discussions, indirectly boosting your online presence.
- Reduced Bounce Rate on Documentation: Easy-to-understand documentation keeps developers engaged on your site, reducing bounce rates, which can be a positive signal to search engines.
- Content for Related Searches: Your documentation can serve as valuable content that answers specific technical questions related to your API’s functionality, potentially ranking for long-tail keywords.
To further enhance the SEO of your API documentation:
- Use Relevant Keywords: Naturally incorporate keywords that developers might use when searching for APIs in your domain within the
info.description, endpointsummary, anddescriptionfields. - Structure Your Documentation Clearly: Use headings, subheadings, and code formatting to make the documentation easy to read and navigate.
- Provide Examples: Include clear and concise code examples in various programming languages.
- Maintain Up-to-Date Documentation: Ensure your documentation accurately reflects the current state of your API. Outdated documentation can lead to frustration and a negative perception.
- Consider a Dedicated Documentation Website: For larger APIs, hosting documentation on a dedicated subdomain or platform can offer more control over SEO optimization.
Google AdSense Compliance for API Documentation
While API documentation is primarily for developers, if you plan to display Google AdSense ads on the same page or website hosting your documentation, ensure the following:
- Valuable Content: AdSense policies emphasize the need for valuable and original content. Your API documentation inherently provides value to developers.
- Clear Separation of Ads and Content: Ensure that ads are clearly distinguishable from your documentation content. Avoid placing ads in a way that could mislead users into clicking them unintentionally.
- Ad Placement Policies: Adhere to Google’s guidelines regarding ad placement, such as avoiding excessive ads above the fold and ensuring a good user experience.
- No Auto-Refreshing Ads: Avoid implementing ad units that automatically refresh without user interaction.
- Avoid Deceptive Practices: Do not use tactics that encourage accidental clicks on ads.
Best Practice: If your primary goal for the documentation site is to serve developers, prioritize a clean and focused user experience. Overly aggressive ad placement can detract from the documentation’s usability. Consider placing ads in less intrusive areas, such as sidebars or footers, if monetization is desired.
Conclusion
Implementing Swagger/OpenAPI is a crucial step towards building a professional and developer-friendly API. It not only generates interactive and comprehensive documentation but also indirectly contributes to your API’s discoverability and overall success. By focusing on clear, accurate, and well-structured documentation, you’ll empower developers to integrate with your API seamlessly, ultimately leading to wider adoption and a thriving API ecosystem. Remember to keep your documentation up-to-date and consider SEO best practices to maximize its reach.
Thank you for visiting my website and reading my blog. Please leave a comment. Happy Coding and documenting!!!!


Leave a Reply